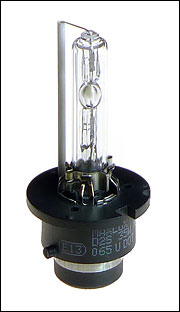
D2S 35W 4200K
It is easy to get access on the left side, while it is very difficult on the other side.

If there are small children in the facility: maybe they will try to mount the battery-clip,
while you are working in the engine room.
|
|
Replacing bulbs in the main headlamp units
- Place the vehicle in a dry, dust-free room.
- Move all side-windows a little bit down. Open bonnet and back lid.
- Disconnect the battery (IMPORTANT!!!). (Open the small cover
on the left side of the luggage compartment, flip up the blue lock lever,
take off the battery-clip and place it well away from the battery.) Do not close the back lid.
- Pull off the front part of the gasket that goes around the engine compartment.
- Remove the plastic covers over each lamp. (Pull up the square
on each plug, and take out the plugs.)
- Put on vinyl gloves.
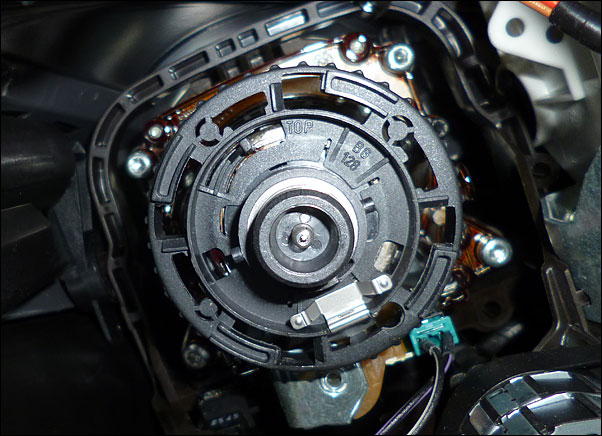
- Pull off the lid at the back of the lamp.
- Twist off the high-voltage section (the cord will be automatically disconnected).
- Twist off the locking ring.
- Remove the bulb.
- Place the new bulb into the locking ring (TOP at 11 o'clock) with the white peg facing down.
- Hold on the back part of the bulb and put it carefully in
place, make sure that the base of the bulb goes into the two notches.
- Keep the bulb steady in place while you twist on the locking ring.
- Twist on the high-voltage section (with the red part facing down).
- Plug in the cord.
- Put on the lid.
- Mount the plastic covers over the headlights.
- Put on the rubber gasket.
- Connect the battery.
- Wait at least one minute before turning on the ignition;
and then wait at least one minute before starting the car.
- Check that all side windows close completely.
- If you have a sun roof, see the instruction manual.
- Adjust the date, time and outside temperature.
Now if you have done everything correctly, you are still among us.
NOTE! If you have any doubts, then leave the job
to the garage, as recommended in the instruction manual.
However, if the job is properly carried out, and there is no fault on the high voltage parts,
there should be no problem to do this work yourself. Because:
- The battery is disconnected.
- The lamps are turned off, and is thus disconnected.
- There's no way to take off the high-voltage parts without the wires falling out.
- It is not possible to connect the wires as long as the high-voltage parts are disconnected.
When a bulb is starting to give discolored light, like
red-pink, it must be replaced. They are available in many price ranges,
but it is probably not wise to buy the cheapest bulbs.
|
|
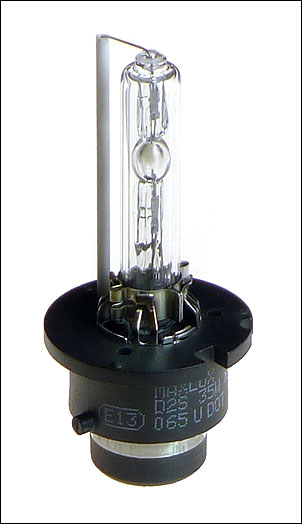
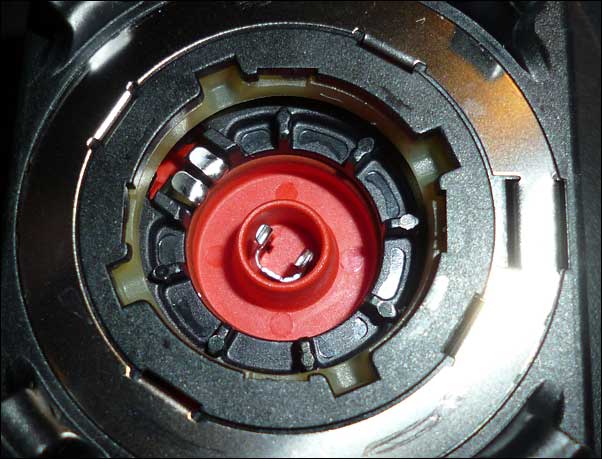
The locking ring and the rear end of the bulb.
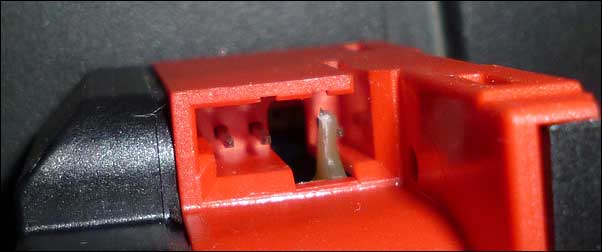
This pin shall be in this position when the high-voltage section is disconnected.
If you are not able to mount the high-voltage section, it may be because
the yellowish-white plastic part inside is out of position.
|
|